
RCC Concrete Construction Process Explained – Working Procedure of RCC
RCC Concrete construction for Reinforcement Concrete (RCC), slab foundations, residential construction, patio pavers, cement binders, and driveways are challenging undertakings, and a set of standards must be followed for proper High strength RCC constructions for their durability.
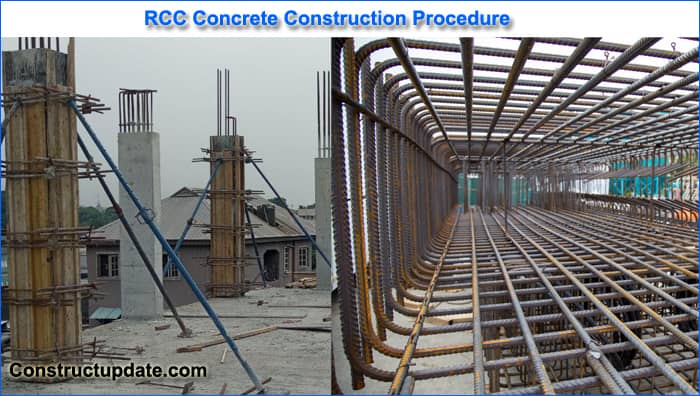
RCC Concrete Construction
Placing of Concrete
Concrete is only poured in the presence of the Employer’s Representative or his authorised representative. After the surface has been properly prepared, surfaces or construction joints where new concrete is to be poured are flushed with a coat of neat cement grout or covered with a coating of mortar that is approximately 3 cm thick.
The mortar has the same quantity of cement and sand as regular concrete, unless otherwise stated. The water-to-cement ratio in the mortar is appropriate for usage and application in accordance with the guidelines given below. Any surface defects are thoroughly rubbed into before the mortar is applied uniformly.
The fresh mortar was then quickly covered with concrete. With the aid of the appropriate tools, concrete is applied against built-up construction joints employing severe puddling and spading to achieve accurate contact with the surfaces of the joints.
No matter what, concrete cannot be retempered. The contractor will not be paid for any concrete that has solidified to the point where proper placement cannot be assured; instead, it will be discarded.
Concrete must always be poured as nearly directly in its ultimate place as is practicable, never in a way that would encourage or facilitate segregation. Excessive separation of coarse particles in concrete, such as that which would occur if the concrete were allowed to fall freely from an excessive height or an excessive angle from the vertical, or strike the forms or the reinforcing steel, is not permitted. In places where considerable separation would otherwise happen, the contractor should instead supply suitable drop chutes and baffles to contain and control the falling concrete.
With the exception of seams, all formed concrete is spread down in horizontal layers that are continuous and are normally no deeper than 50 cm. The Employer’s Representative retains the authority to request lower layer depths in cases when concrete cannot be put in the 50 cm layers required by this standard. All intersections of construction joints with concrete surfaces that will be visible are made straight, level, or plumb unless differently specified on the Drawings as desired by the Employer’s Representative.
Large Blocks: The contractor must first build up the concrete to the full width of the structure and the full height of the lift over a small area at one end of the structure, and then continue in similar, progressive stages across the structure to cover the entire area. This is done to keep the exposed area of fresh concrete in large, thick exposed areas to a minimum. The slope formed by the unbound edges of concrete is kept as steep as is practicable to reduce its area.
Concrete along these borders is not vibrated until neighbouring concrete in the layer is placed unless conditions are such that the concrete will harden to a degree where following vibrations will not properly consolidate and integrate it with more recently placed adjacent concrete. Big aggregate clusters are dispersed prior to new concrete being poured on top of the old. Concrete installation in a structure cannot be stopped once it has begun unless appropriate construction joints can be made.
Rain: The mortar made of coarse aggregate on the slopes of the placement cannot be washed away by prolonged or heavy rain. During such downpours, mortar shouldn’t be put into building joints, and any diluted mortar that has already been used should be taken off and replaced before continuing with the project.
Buckets: The necessary low-slump concrete mixes can be promptly discharged when concrete buckets are used, and the dumping mechanism is designed to allow the discharge of as little as 0.35 m3 of the load at a time. Buckets can be attached to and used with drop chutes when confined spaces are present.
Transportation, Placing & Compaction
- Concrete must be transported by transit mixers from batching plants to pouring locations. Once it reaches the job site, concrete needs to be poured.
- For in-depth concreting, a chute is required. There shouldn’t be more than 1.5 metres of vertical drop.
- After being put into the formwork, concrete needs to be mechanically vibrated to be compressed.
- Immersion-type vibrators must be mounted vertically to avoid over or under-vibration.
- Concrete must be moved and installed using all safety procedures in order to avoid any quality degradation.
- Care must be used when hounding, mounding, and shaking the concrete between batches. Before pouring concrete, the area must be thoroughly cleaned.
- Concrete must be placed as close to its final location as is practicable in order to eliminate re-handling.
- All metal inserts, anchor bolts, pipe sleeves, etc. must be fixed in accordance with the applicable drawing before concrete is poured, and that drawing must be checked for lines and levels. First, the necessary pipes, fittings, and electrical conduits must be installed.
Concrete Temperature
Usually, concrete is placed at a temperature of no more than 300C. On the construction site, concrete is mixed in the sweltering heat before being immediately placed. If the weather causes the temperature to rise over + 320 C, the contractor may take the required measures to keep the concrete’s temperature below the above-specified level (for example, putting concrete at night).
Taking Down Forms
- The timing and method for removing and shifting the forms must be approved by the Employer’s Representative, and care must be given to avoid damaging the concrete. It is not possible to load “green” concrete. When the forms are removed, the surface of the concrete is carefully inspected, and any surface anomalies are immediately corrected to the Employer’s Representative’s satisfaction.
- The minimum time required between the laying of the concrete and the removal of the forms is two days for unloading walls and other side forms. The minimal period of time is seven days for conduits and supporting walls, while it is fourteen days for bridge decks.
Concrete Curing and Surface Protection
All concrete is cured with either water or, as will be detailed subsequently, a sealing compound containing white pigment. The Employer’s Representative may choose the curing technique that the Contractor will use in each component of the work to prevent damage.
In order to prevent damage, water-cured concrete must be maintained wet for at least fourteen days following the installation, starting as soon as the concrete has sufficiently hardened. A network of perforated pipes, mechanical sprinklers, porous hose, or any other method that has been approved and will keep all surfaces continuously (not occasionally) wet throughout the curing process is used to cover the exposed concrete surfaces and the forms during the curing process. The requirements for water used in concrete mixing must be met by water used in curing.
For at least three days after installation, all exposed concrete surfaces—aside from those sealed in the white pigmented sealing compound—are protected from the sun’s direct access. This protection is effective as soon as is practically possible once the forms are taken down. Until it has been fully accepted by the Employer’s Representative, all concrete must be protected by the Contractor against harm.
Finishing of Unformed Surfaces
The following are the finish clauses for unformed surfaces:
With enough leveling and screening, unformed surfaces that are covered in concrete or backfill are given a smooth, level finish. The measurement stated in paragraph D above is used to determine that surface imperfections should not be larger than 1.9 cm.
Surfaces that have not been formed but have been impacted by rushing water are finished using a strong steel trowel. On bridge decks, surfaces with a light-broomed finish are frequently used by both vehicle and pedestrian traffic. Equipment that is driven or operated by hand is used for floating and trowelling. As soon as the screening surface has sufficiently consolidated and attained the least level required to produce a surface free of screed marks and with a uniform texture, floating and trowelling are initiated.
Trowel marks or sudden abnormalities are not allowed, and surface irregularities, as determined using the procedure given in paragraph D above, must not be greater than 6 mm. Edges and joints are tooled.
Repairing Concrete Surface
After the forms have been removed, if any concrete is found to not have been formed as shown on the Drawings, to be out of level, or to have a defective surface, it is deemed to not have been built in accordance with the intent of the specification and must be removed and replaced by the Contractor within 72 hours at his expense, unless the Employer’s Representative grants permission to patch the problem area, in which case the patch must be made in accordance with the Employer’s Representative’s instructions.
Defects that necessitate replacement or repair include honeycombs, form-related damage, loose concrete fragments, bolt holes, tie-rod holes, ridges at formed joints, and bulges caused by the movement of the forms.
By using a tool or chipping, then rubbing with a grinding stone, ridges, and bulges are removed.
The honeycombed or otherwise defective concrete was chipped out, and the voids that remained were precisely edged and shaped to accommodate the filling. All holes must be thoroughly soaked for 24 hours prior to filling them. The texture of the filling’s surface or finish matches that of the nearby concrete surface. All patches have, in the opinion of the Employer’s Representative, attained the above-mentioned concrete curing standards.
To fill in flaws, bolt and tie-rod holes, and chipped-out honeycomb sections that need to be fixed, a non-shrink patching compound that has been approved by the employer’s representative in the amount recommended by the manufacturer should be used. When the materials have been completely combined, the mortar should mold easily. Applying thin coats of mortar repairs, they are then completely compacted with the appropriate equipment. It is important to thoroughly fill rod, bolt, and pipe holes so that the mortar is compressed to the depths of the holes.
Where concrete will be visible, the mortar will be made to match the color of the concrete by substituting white Portland cement for a certain proportion of regular cement. When the Employer’s Representative believes that the extent of the flaws in structures that are visible is such that patching alone cannot result in a surface with a satisfactory appearance, the Contractor is required to apply a sack-rubbed mortar finish to such surfaces and adjacent surfaces in accordance with the Employer’s Representative’s instructions.


Stepped Footing Details | Stepped Foundation Reasons and Application

Building a Foundation on Clay Soil | Clay Soil Foundation Problems

Roller Compacted Concrete or RCC | Application, Advantages and Benefits
About The Author
John Steffen
I love to share my experience on civil engineering and construction estimates. As a highly capable individual with a strong academic background, I am proud to say that I already possess a comprehensive understanding of the technical elements of civil engineering.